
A few days ago I had to migrate my development laptop. For that I usually use Macrium Reflect, which works perfectly for cloning hard drives and managing partitions. However, when attempting to restore the image, the tool was not detecting the target drive.
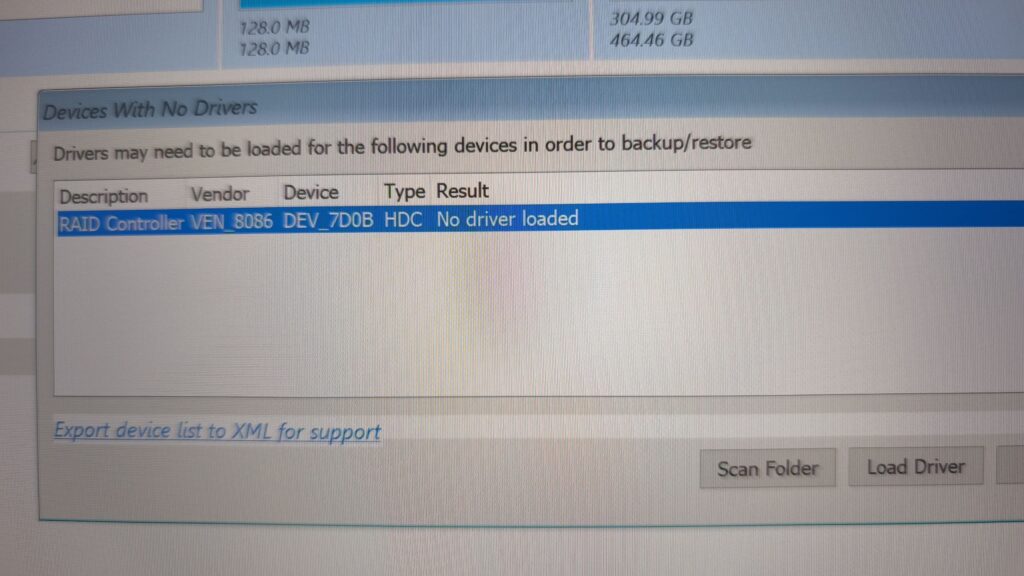
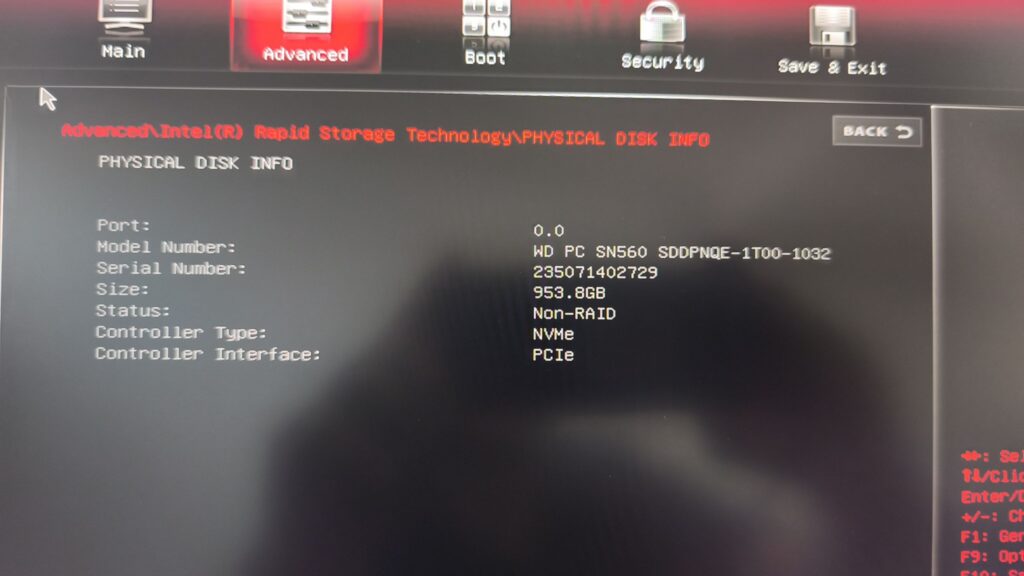
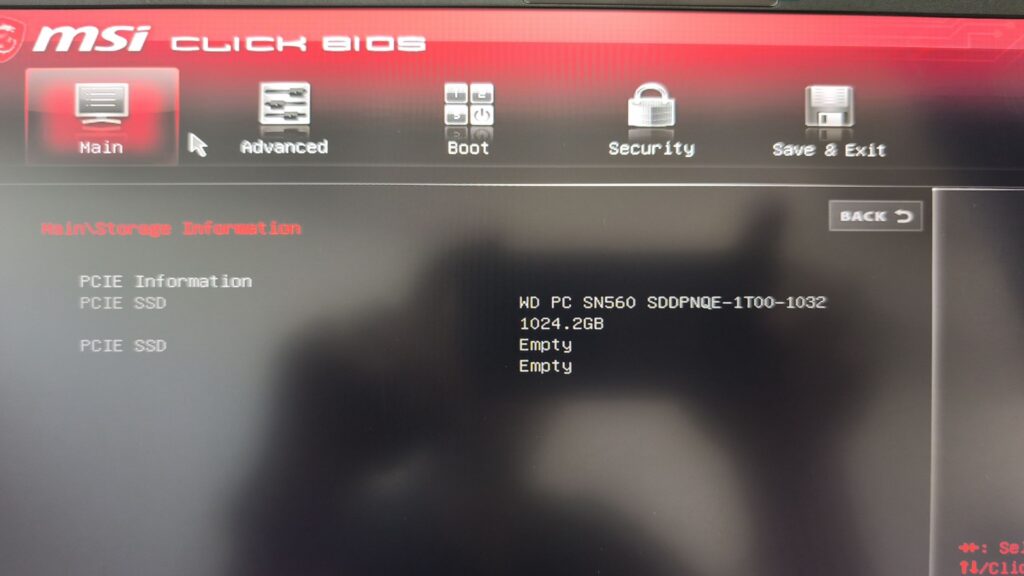
The drive appeared correctly in the BIOS, but the root cause of it not showing up in Macrium Reflect was the VMD (Volume Management Device) controller.
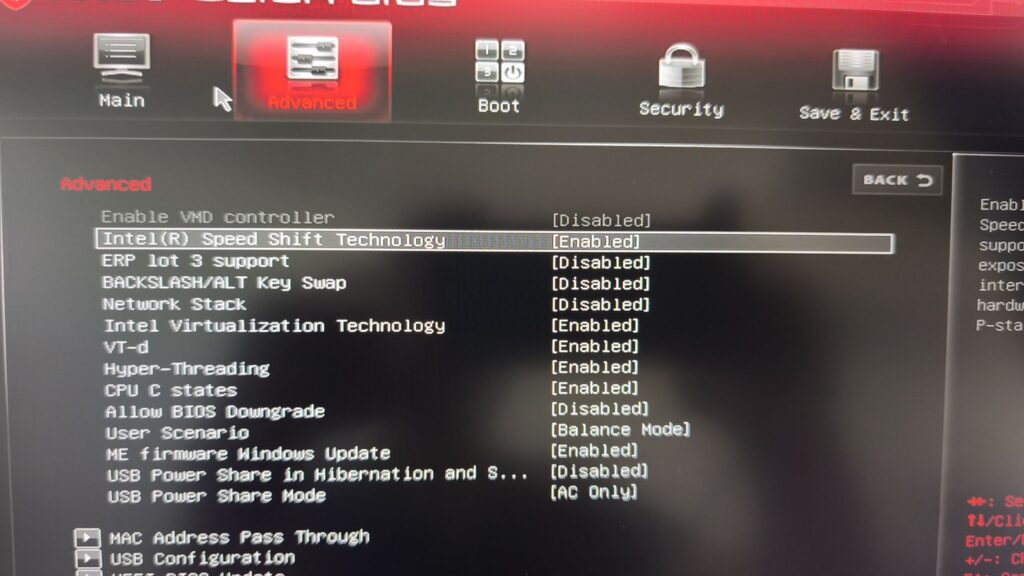
At that point I had to make a decision: since I was not using RAID or Intel Optane, I decided to disable it — but there was no straightforward way to do so directly from the standard Advanced menu.
This is where the magic tricks begin, similar to what I previously documented with an Acer
It turns out there is an undocumented key combination that reveals hidden BIOS options — reminiscent of a puzzle straight out of Monkey Island.

Steps to Unlock VMD on MSI Laptops
This procedure unlocks hidden BIOS settings on MSI laptops, including the Intel VMD controller configuration.
1. Enter the BIOS
Restart the laptop and press the Delete key repeatedly until the BIOS menu appears.
2. Master Key Combination
Once inside the BIOS, simultaneously hold down the following four keys:
Right Shift + Right Ctrl + Left Alt + F2
Locate the VMD Setting
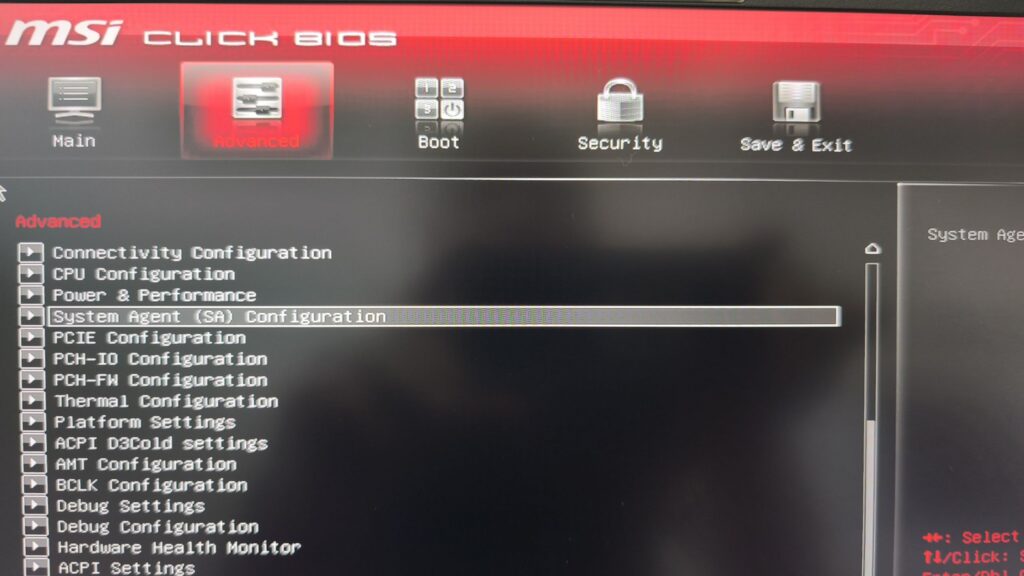
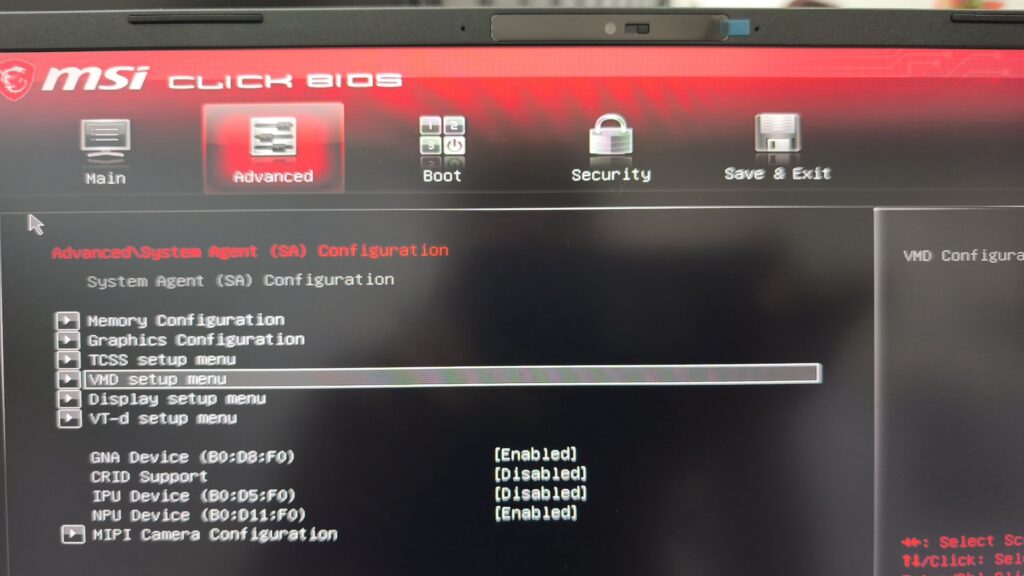
After triggering the key combination, hidden tabs and menus will become visible. Navigate to:
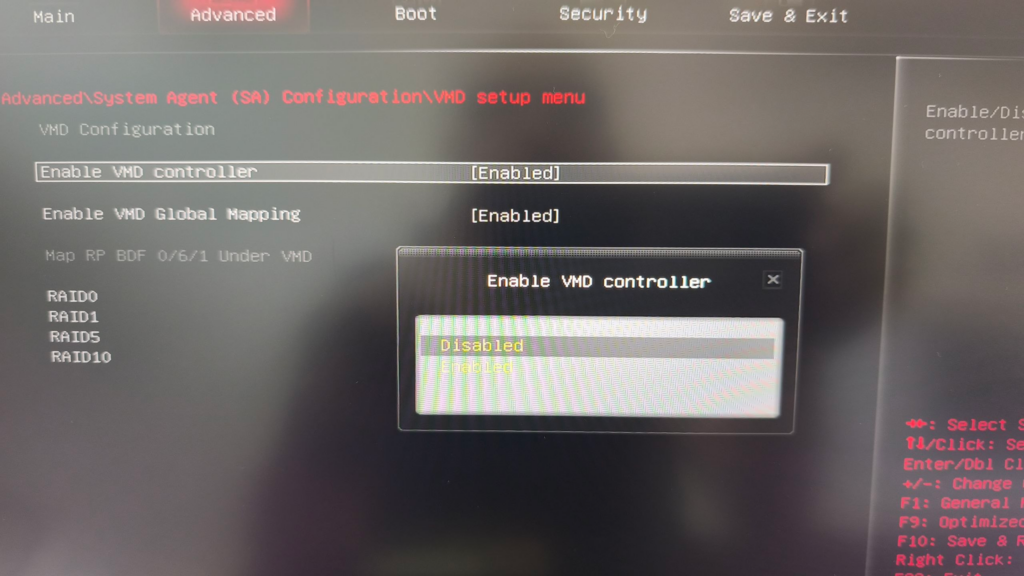
Advanced → System Agent (SA) Configuration → VMD Setup Menu
Change the “Enable VMD controller” option to Disabled.
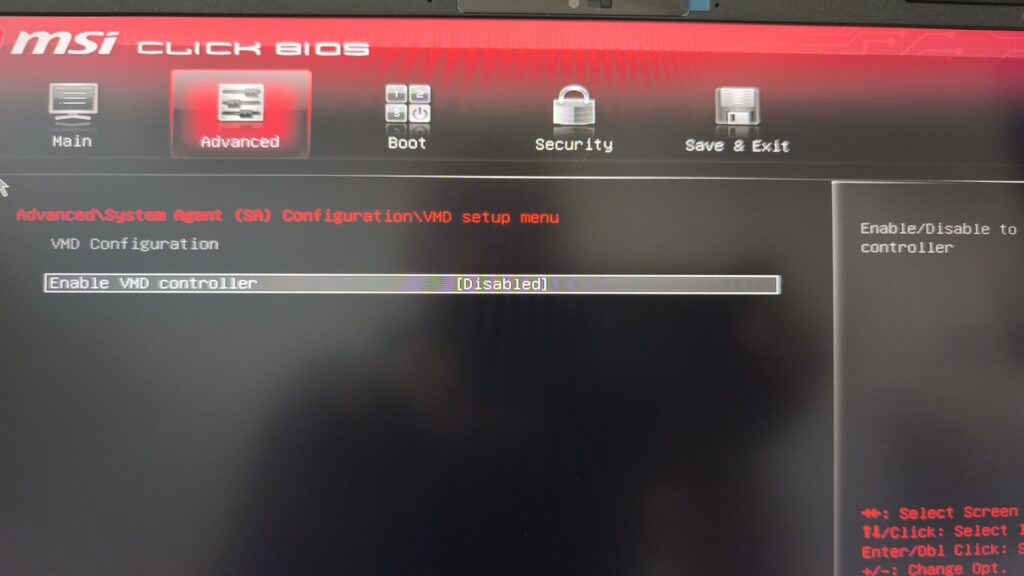
The VMD controller will appear as disabled
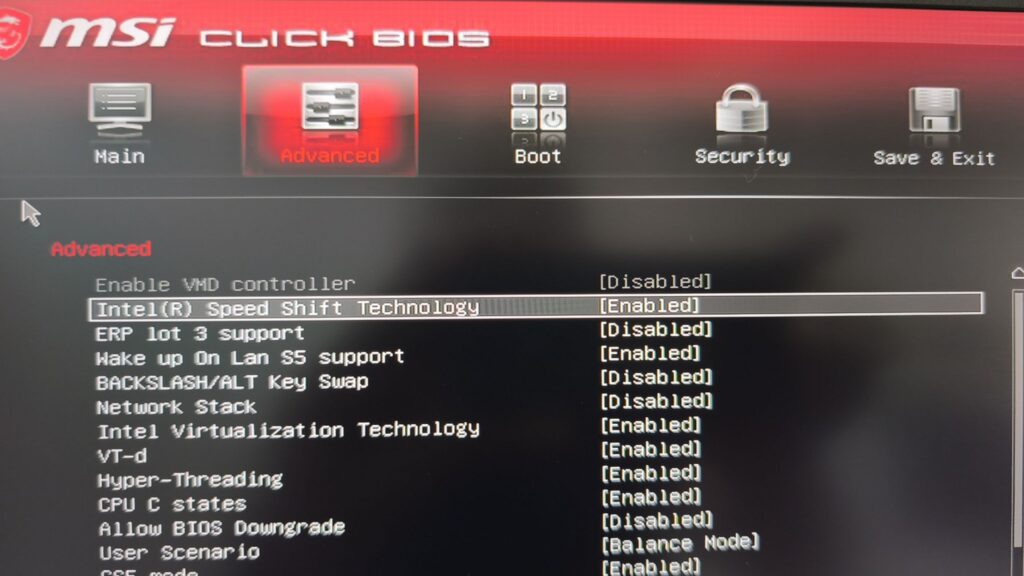
Press F10 to save the changes and restart the system.
After completing these steps, the VMD controller will appear as disabled, and the storage drive will be visible and fully accessible to tools like Macrium Reflect that interface directly with the storage subsystem outside of the VMD abstraction layer.